Methods of Deployment of SSAS
There are mainly 5 main methods of the deployment of a analysis project made on the development server – (They are listed according to the advantages)
- Deployment with AMO Automation.
- Deployment with XMLA scripts.
- Deployment Wizard.
- Deployment with the synchronize wizard.
- Deployment with Backup/Store.
Using the Analysis Services Deployment Wizard –
SSAS includes a tool called the Deployment Wizard which will do exactly what you need. The Deployment Wizard uses the artifacts created by your SSAS project and can perform the deployment and/or generate an XMLA script that can be used to perform the deployment at a later time. XMLA stands for XML for Analysis Services and it is the native protocol used by SSAS. All commands sent to SSAS are in the XMLA format. An XMLA script is an XML file. The ability to generate the XMLA script allows the developer to provide the IT team what they need to perform the deployment. In this tip we will review the BIDS artifacts, walk through the Deployment Wizard to create the XMLA script, and then show the options to execute the script.
BIDS Artifacts
When you create an SSAS project using BIDS there are a number of files that contain the details about your project. You can find these files in the bin folder within your project folder. As you make selections and enter options in the various property dialogs in your project, those details are persisted in the files in the bin folder.
The Input Files Used to create the deployment script –
XMLA File
|
Description
|
[project name].asdatabase
|
Contains the declarative definitions for all SSAS objects
|
[project name].deploymenttargets
|
Contains the name of the target SSAS instance and database
|
[project name].configsettings
|
Contains environment specific settings such as data source connections and object storage locations. These settings override what's in [project name].asdatabase.
|
[project name].deploymentoptions
|
Contains options such as whether deployment is transactional and whether objects should be processed.
|
Running the Deployment Wizard –
You can launch the Deployment Wizard from the Analysis Services program group within the Microsoft SQL Server program group. The wizard requires that you be able to connect to the target deployment server.
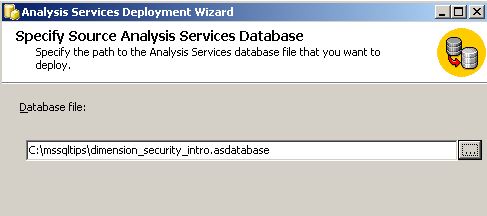
1. Specify Source Analysis Services Database
Navigate to the [project name].asdatabase file in the bin folder of your BIDS project:
2. Installation Target

Specify the target deployment server and the name of the SSAS database on that server. Remember you must be able to connect to the server. If you cannot connect to the server you will have to specify something like localhost to get through the wizard.
3. Specify Options for Partitions and Roles

After initial deployment, an administrator may change the partitioning and/or roles and members. When you deploy you have to decide whether or not to overwrite these settings based on what you have in your SSAS project.
4. Specify Configuration Properties
Administrators may make changes to various configuration properties after deployment and you may need to preserve those settings rather than overwrite them with what's in your project. In the case of data source connection strings, you make not even know the server names and credentials used to connect to them. Optimization settings will likely change as the size and usage of the SSAS database increases over time. Again the safest approach is to retain the settings rather than overwrite them.

5. Select Processing Options
You can specify whether to process the SSAS objects after deployment. Default processing allows SSAS to decide what needs to be done; full processing can be used to process all objects. You can also choose not to process at all. You can select whether to perform the entire deployment in a single transaction. If this option is unchecked, each step of the deployment proceeds in its own transaction.

6. Confirm Deployment
Use this dialog to optionally specify whether to generate an XMLA script and save it in the folder of your choice. After clicking next on this dialog the wizard will perform the deployment. It's a good idea to save the deployment script.

7. Deploying database
This dialog shows the results of performing the deployment.

Executing the XMLA Script
When you use the Deployment Wizard to generate the XMLA script for deployment, you can choose from the following options to execute the script:
· Use SQL Server Management Studio to connect to the target Analysis Services server, select File, Open from the menu to open the XMLA script file, then click on the Execute button (or Ctrl-E) to execute the script
· Create a SQL Server Agent job with a job step type of SQL Server Analysis Services Command; specify the SSAS server, put the XMLA script in the command text box, then execute the job or schedule it for execution at a later time
· Create a SQL Server Integration Services (SSIS) package, add an Analysis Services Execute DDL Task, specify an Analysis Services connection manager, and put the XMLA script in the task
· Execute the XMLA script with the ASCMD utility
The Command Line Code --
ASCMD -S servername -v database=mssqltips -i "c:\mssqltips\sample.xmla"
Command line options:
· -S servername - the name of the SSAS deployment server
· -v variable=value - you can assign values to one or more variables in your script; add additional variable=value statements to set a value for other variables
· -i scriptfile - the full path to the script to execute

Comments
Post a Comment